Flourless Red Velvet Torte
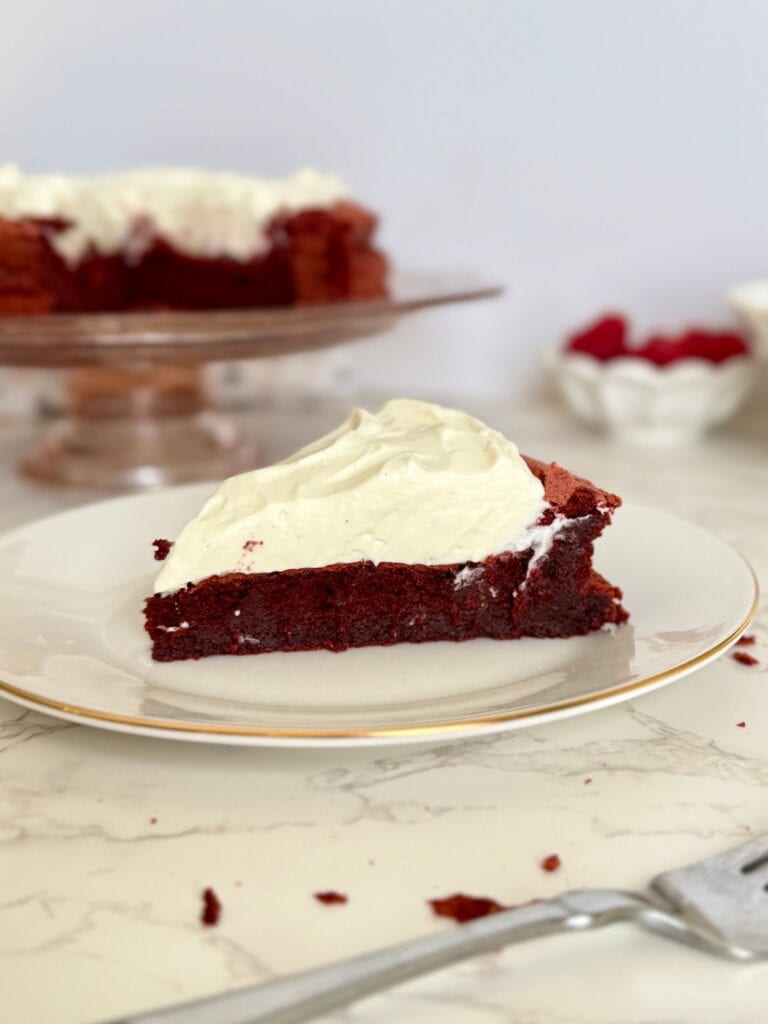
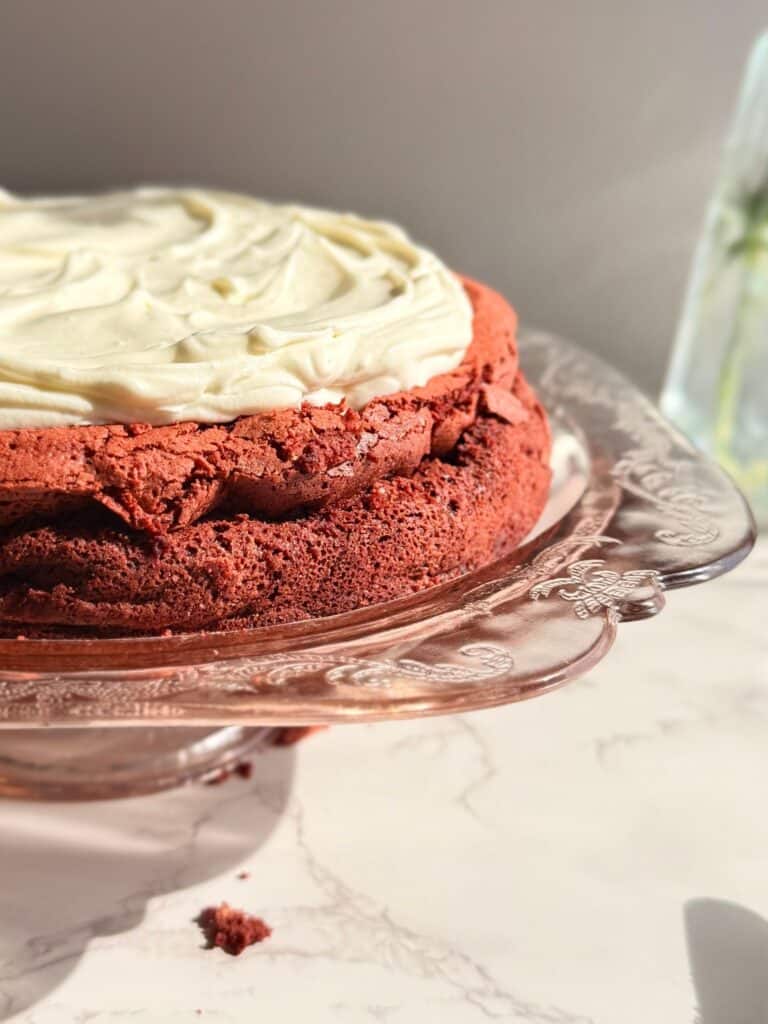
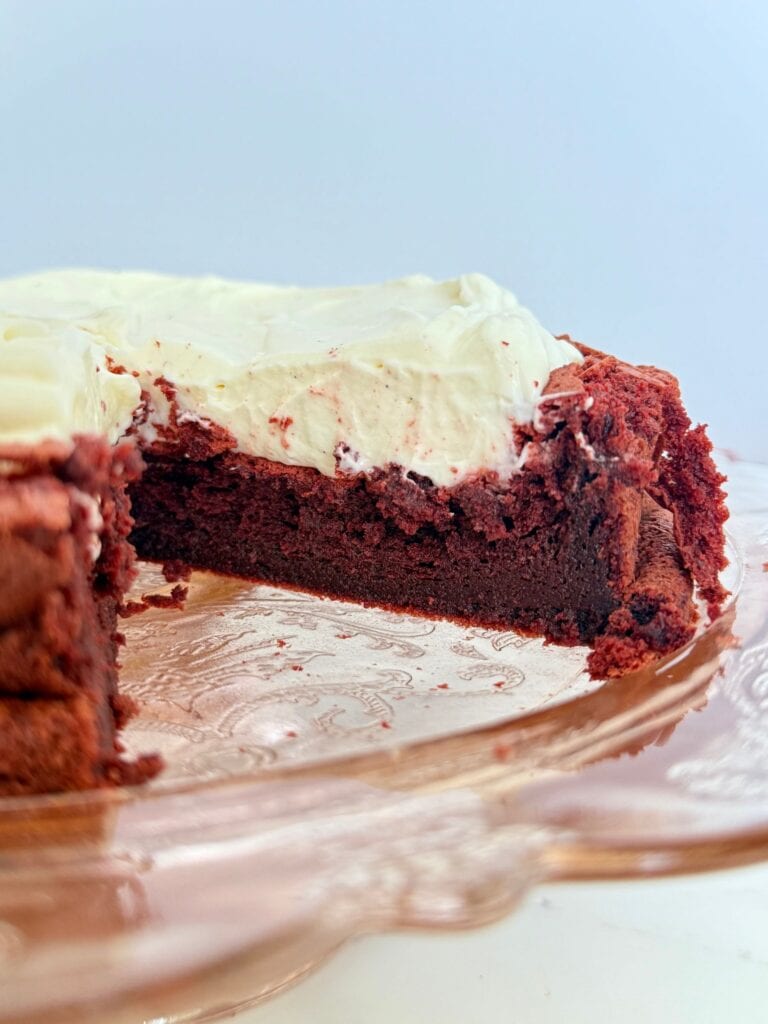
This Flourless Red Velvet Torte is rich and fudgy, yet somehow still soft, velvety, and melt-in-your-mouth at the same time. It brings together the classic red velvet color and flavor with the lush, decadent texture of a flourless chocolate torte. It is finished with a light, tangy cream cheese whipped topping, for that iconic red velvet pairing we all know and love. The dramatic red color and signature rise-then-fall give it a perfectly imperfect, effortlessly elegant look. Made with just a handful of ingredients and no flour, it’s indulgent, simple, and perfect for sharing on a special occasion.
What is a Flourless Torte?
Before we get started, let’s do a quick breakdown of what a flourless torte actually is. You’ve probably seen one on a restaurant dessert menu, but it’s surprisingly simple to make at home. A flourless torte (also sometimes refered to as a flourless cake) is a rich, dense chocolate dessert made without any flour, relying on eggs for structure instead. The yolks add richness while whipped egg whites incorporate air, giving the torte its dramatic rise in the oven and signature fall as it cools—creating that beautifully sunken, crackly top. This red velvet version leans extra torte-like with a velvety, almost truffle-like interior, balanced chocolate flavor from cocoa powder and semisweet chocolate, and that classic red velvet tang from a splash of vinegar. Finished with a light cream cheese whipped topping, it’s classic red velvet flavor wrapped up in rich, fudgy, flourless torte form.
Ingredient Overview
- Eggs: The whipped egg whites add air and structure, while the yolks provide richness and stability.
- Granulated Sugar: Part of the sugar helps the egg whites whip up glossy and stable; the rest sweetens and enriches the chocolate base.
- Butter: Melted first and used to gently melt the chocolate off the heat, creating a smooth, glossy mixture.
- Semisweet chocolate: Use good-quality chocolate for the best flavor and texture. Semisweet keeps the chocolate flavor subtle—avoid dark chocolate to stay true to classic red velvet. I use Baker’s Semi-sweet Chocolate Bar.
- Unsweetened cocoa powder: Traditional in red velvet cake; unsweetened cocoa gives a lighter color and a more delicate chocolate flavor than Dutch-processed.
- Oil: Just a small amount helps keep the torte soft and moist. Use a neutral oil like canola.
- Vinegar: A classic red velvet ingredient that adds a subtle tang and balances the sweetness.
- Salt & vanilla extract: Round out and enhance all the flavors.
- Red food coloring: Essential for the signature red velvet color; liquid or gel food coloring works.
- Cream cheese: Softened cream cheese blends smoothly into the whipped topping—let it sit at room temperature before using.
- Heavy cream: Cold heavy cream whips up light and fluffy for the topping.
- Powdered Sugar: Sweetens the topping while keeping it smooth and silky
Step-by-Step Instructions
1. Prep the pan & preheat the oven
Preheat your oven to 325°F. Grease an 8-inch round or springform pan with baking spray and line the bottom with parchment paper. Whichever pan you use, it should have tall sides (I use an 8×3-inch cake pan) as this will rise significantly.
2. Make the chocolate base
In a medium saucepan over medium heat, melt the butter. Once fully melted, remove the pan from the heat and add the chocolate, stirring until completely smooth and glossy. If the hot butter doesn’t fully melt the chocolate, you can place it back over low heat and gently finish melting the chocolate, stirring until smooth. Whisk in the cocoa powder until no lumps remain.
Next, whisk in the oil, vinegar, salt, vanilla, and red food coloring until fully combined. Set the mixture aside to cool slightly.
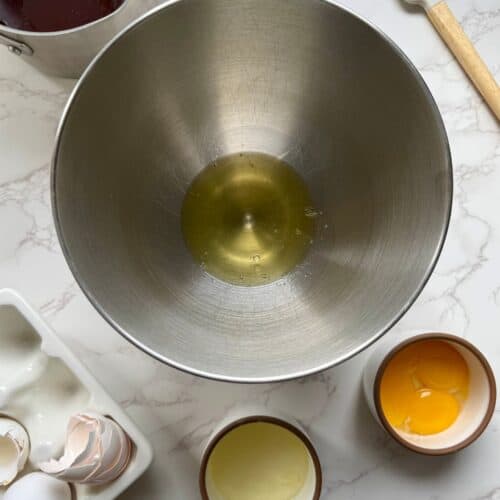
3. Separate the eggs
Carefully separate the eggs, placing the whites in one bowl and the yolks in another. The best method I have found is to crack each egg over a “buffer” bowl first, pass the yolk back and forth between the eggshells, letting the white separate and fall into the buffer bowl. Then transfer the white and yolk to their respective bowls. This way, if a yolk breaks, it won’t contaminate all of your egg whites.
Trust me, I have wasted many egg whites before trying to skip this step just for one tiny drop of egg yolk to ruin the whole batch! Even a small amount of yolk or grease can prevent egg whites from whipping properly, so take your time here.
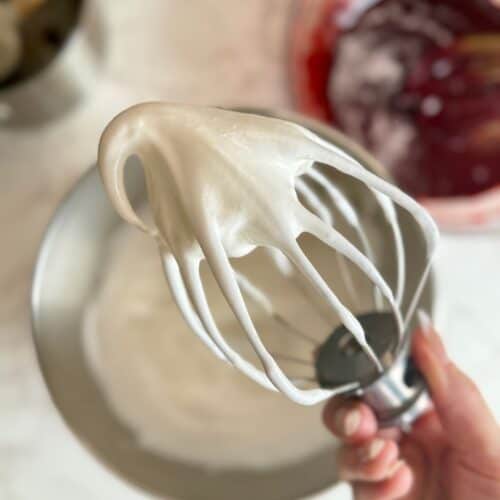
4. Whip the egg whites
Using a stand mixer or hand mixer, whip the egg whites in a clean, dry bowl on medium speed until frothy. With the mixer running, slowly stream in the sugar. Once all the sugar is added, increase the speed to high and continue whipping until the whites are glossy and hold soft to medium peaks.
You’ll know they’re ready when the whites look smooth and shiny, and the peaks gently hold their shape but still bend at the tip. Stop the mixer and check the consistency periodically to ensure they don’t overwhip to stiff peaks.
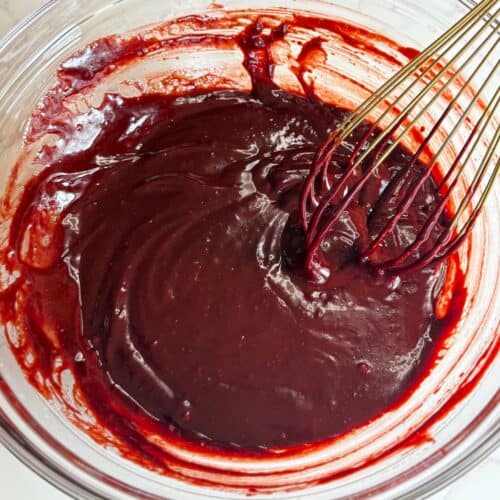
5. Combine the yolks & chocolate
In a separate bowl, whisk the egg yolks with the remaining sugar until just slightly lighter in color and frothy.
Slowly stream the cooled chocolate mixture into the yolks while whisking, mixing until the batter is silky and evenly combined.
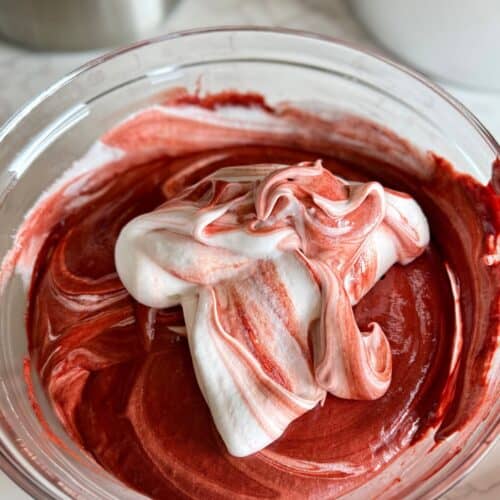
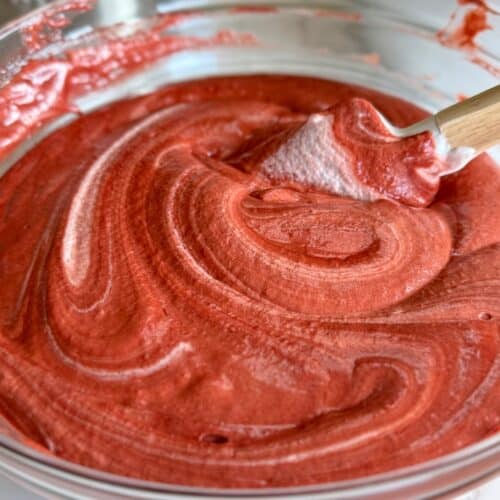
6. Fold in the egg whites
Add the whipped egg whites to the chocolate mixture in three additions. Start by gently folding in the first portion to lighten the batter, then fold in the remaining whites in two more additions.
To properly fold, use a gentle motion, scraping from the bottom of the bowl and folding over the top, rotating the bowl as you go. Stop folding as soon as the whites are incorporated—some faint streaks disappearing as you fold is perfect. Just be gentle, as overmixing can deflate the batter.

7. Bake
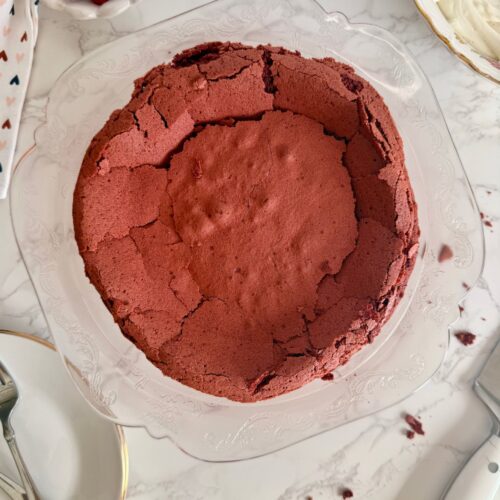
Pour the batter into the prepared pan and smooth the top. Bake for 35–40 minutes, until the torte has risen significantly, is set around the edges, and slightly cracked on top.
A toothpick inserted into the center should come out with moist, fudgy crumbs. This torte is meant to be rich and soft—slightly underbaked is better than dry. As soon as it comes out of the oven, run a butter knife around the edge of the pan to help prevent sticking as it cools.
8. Cool
Let the torte cool completely at room temperature. It will fall and collapse as it cools—this is completely expected for a flourless cake, so don’t worry!
Once cooled, run a butter knife around the edges again if needed, invert the torte onto a plate, then flip it upright onto a serving platter.
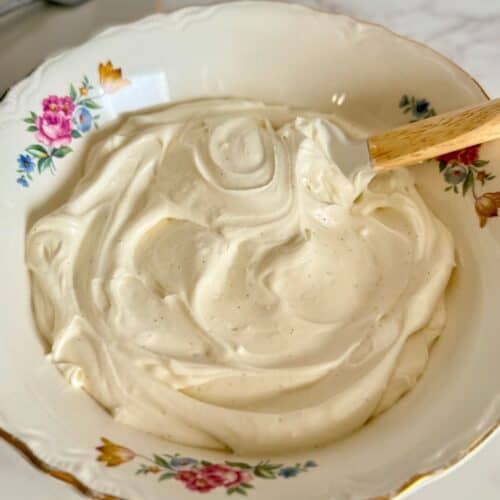
9. Make the cream cheese whipped topping
In a stand mixer or using a hand mixer, beat the softened cream cheese, powdered sugar, vanilla, and salt with about ¼ cup of the heavy cream until smooth. Be sure to scrape down the bottom and sides to ensure there are no lumps of cream cheese. Add the remaining cream and whip until light and fluffy.
10. Serve
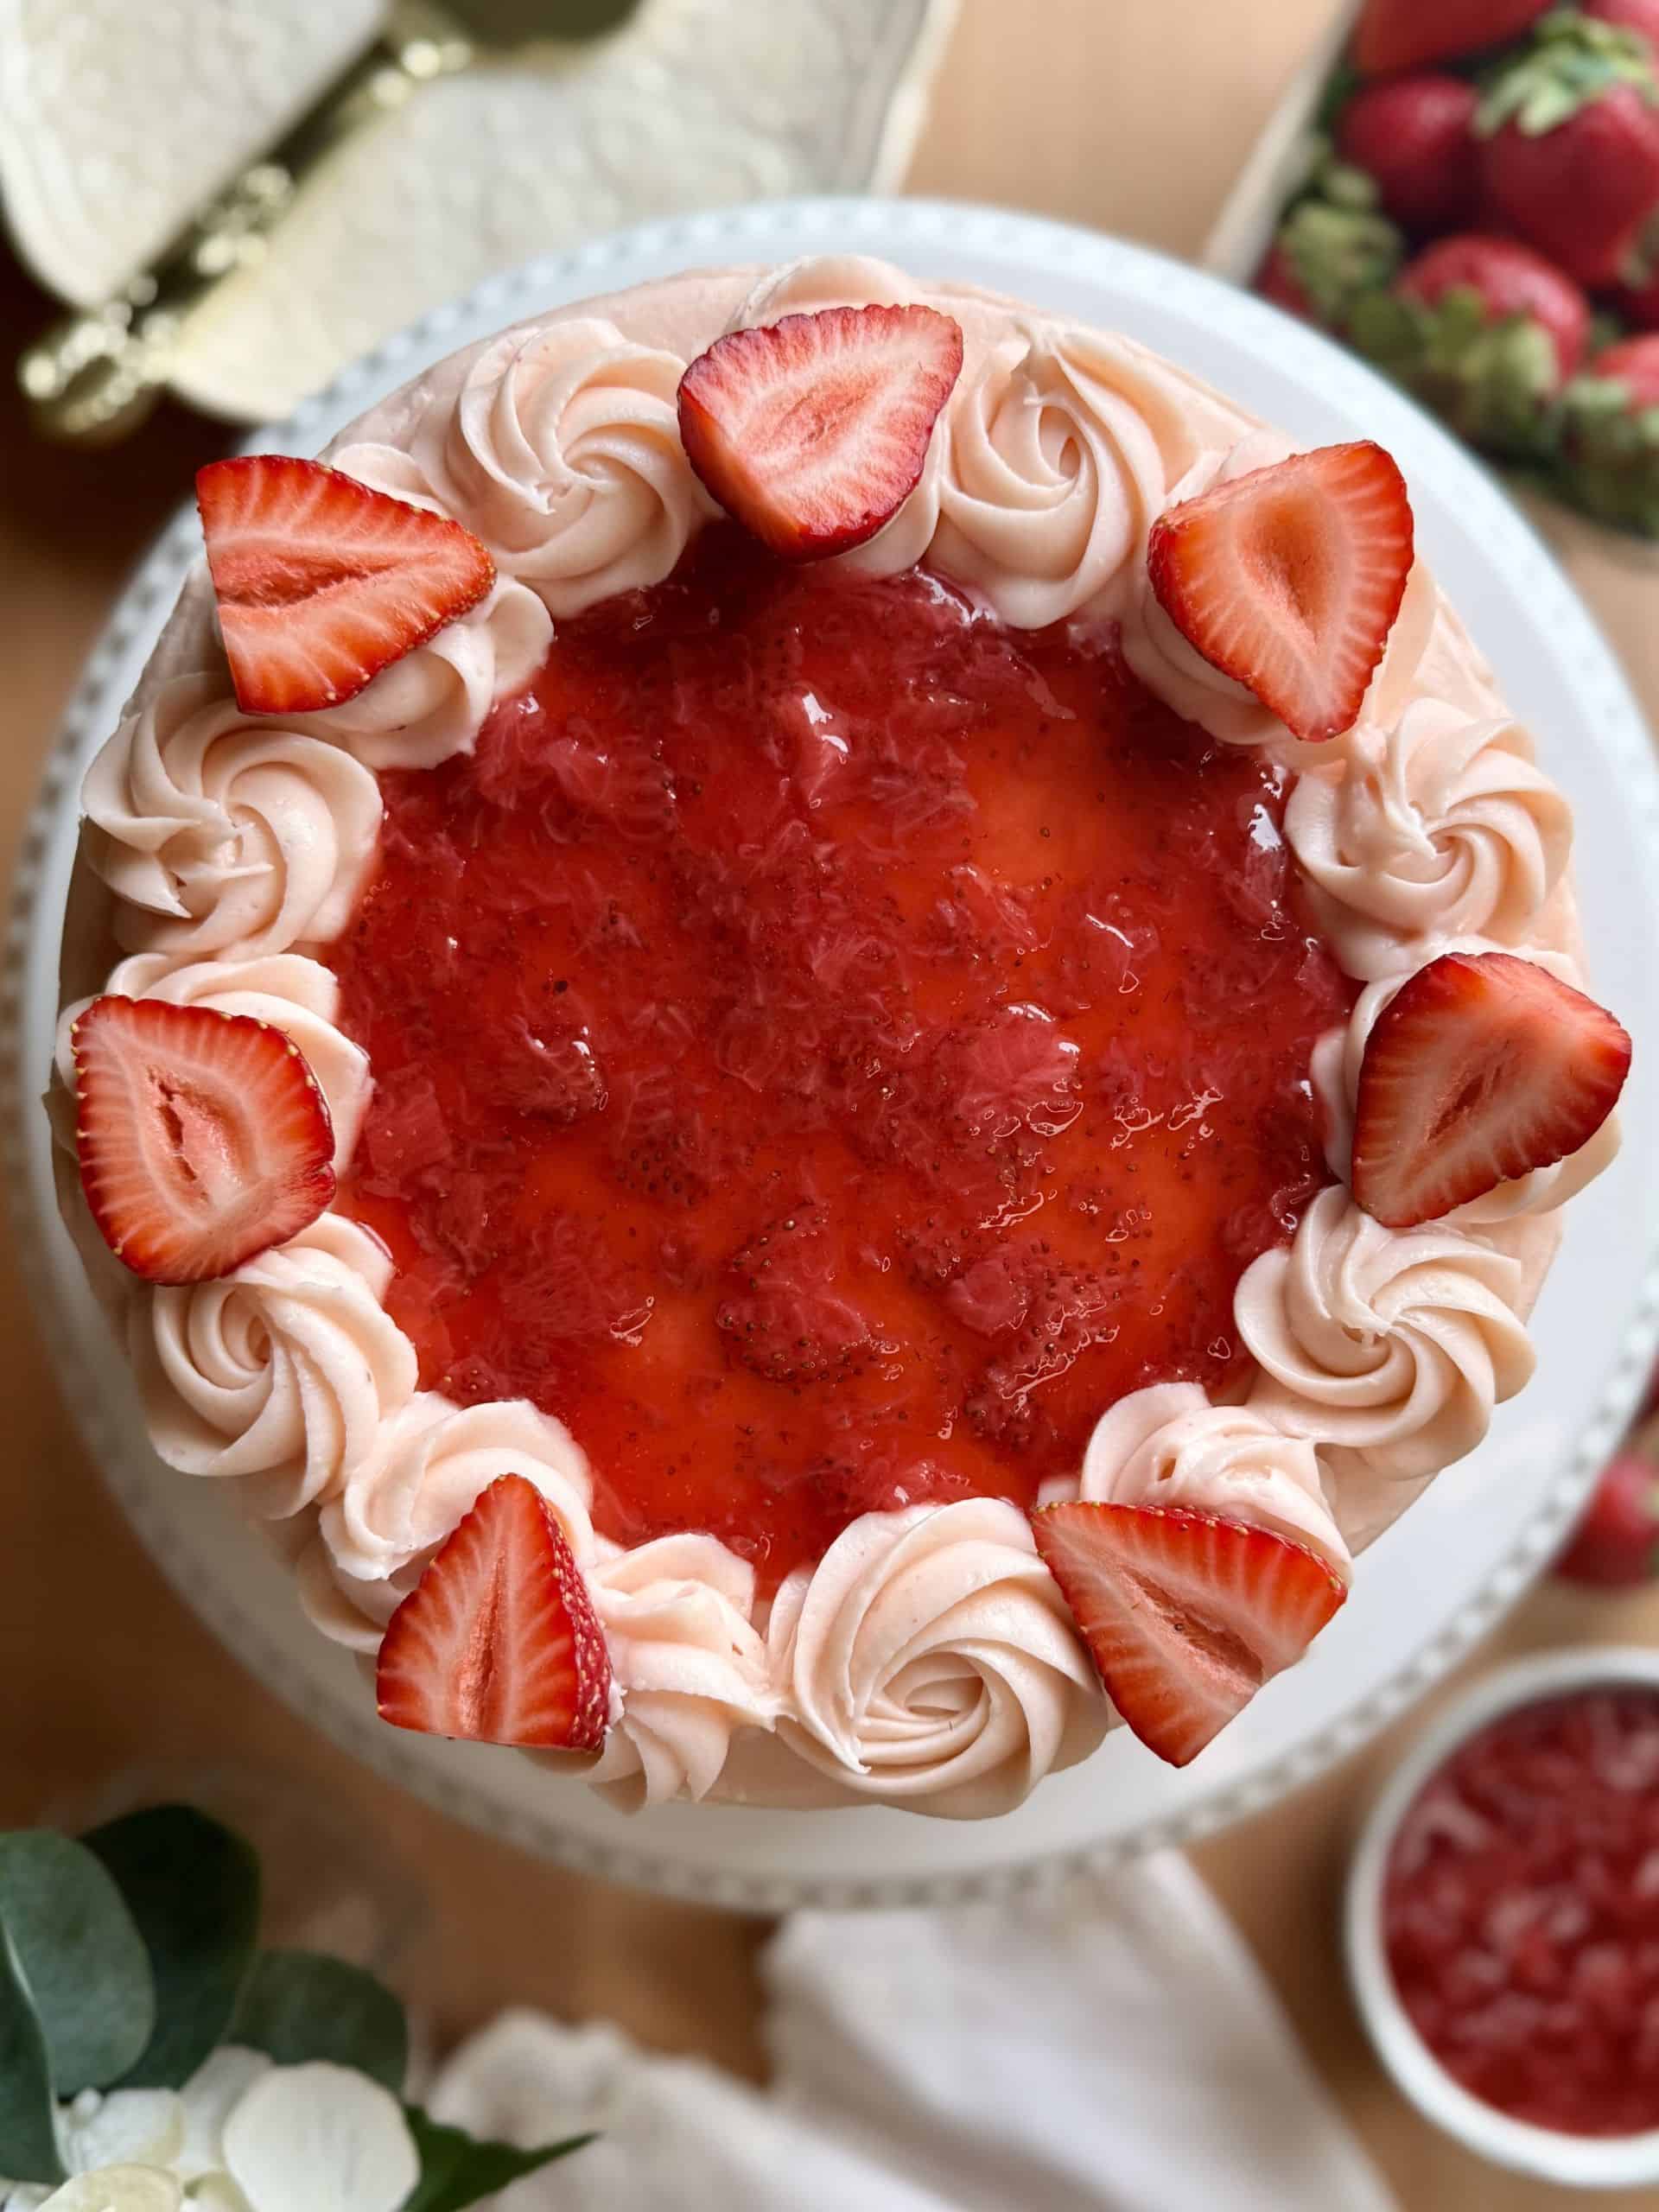
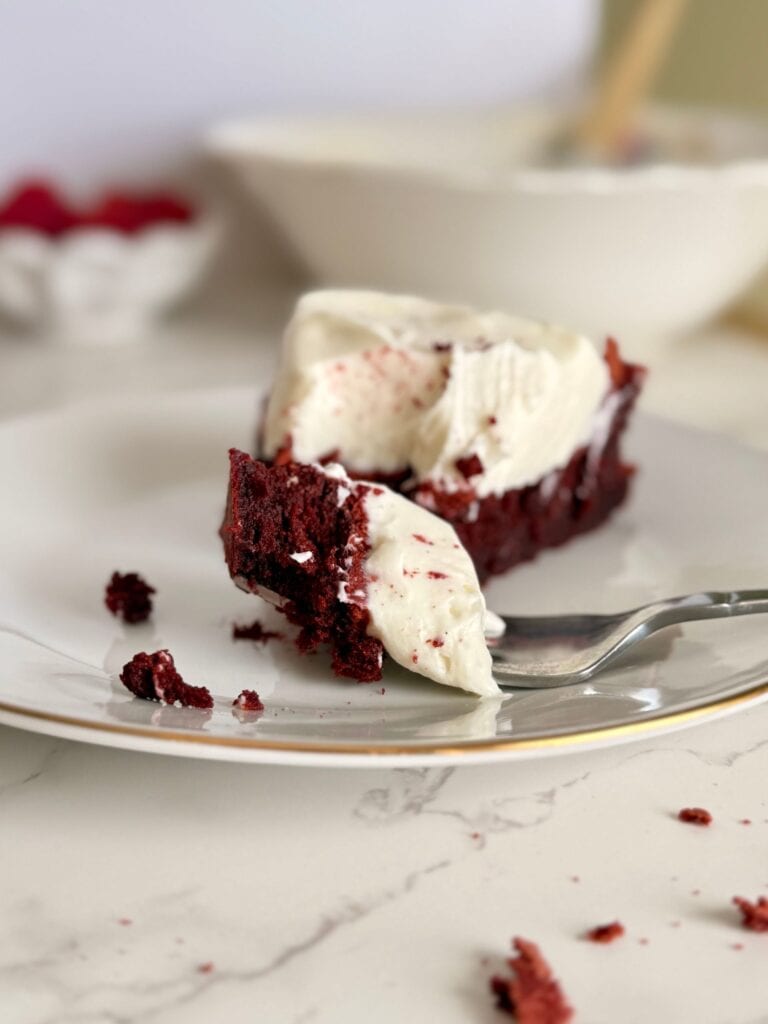
Serve the torte at room temperature for a fudgy, velvety texture, or chill for 30 minutes to 1 hour for a denser, truffle-like slice. Dollop the cream cheese whipped topping over the torte or serve it alongside individual slices. You can garnish it with fresh fruit or a dusting of cocoa powder, or leave it simply elegant as is!
Blue Mountain Baker’s Tips
How to easily separate eggs: When separating eggs for whipped egg whites, it’s important that no yolk gets into the whites. Even a small amount of fat can prevent them from whipping properly. Cold eggs are easiest to separate, and cracking each egg into a small “buffer” bowl first helps avoid accidentally contaminating the whole batch if a yolk breaks.
Whipping egg whites to the right stage: Egg whites can be whipped to soft, medium, or stiff peaks. This refers to how the peak looks when you lift the whisk: soft peaks fall over, medium peaks hold their shape but gently curl at the tip, and stiff peaks stand straight up. For this torte, you want glossy medium peaks that hold their shape with a soft bend. Underwhipped whites won’t give the torte enough lift, while overwhipped whites are harder to fold in and can lead to a more dramatic collapse. Stop whipping when the whites look smooth, shiny, and billowy.
How to properly fold: Folding is different from stirring—it’s a gentle technique used to combine mixtures of different textures without knocking out the air. For this torte, you’ll fold the whipped egg whites into the thicker chocolate base. Add the whites in three additions, and use a light hand: drag your spatula down through the center, scoop from the bottom, and fold the batter up and over the top, turning the bowl as you go. Fold just until mostly combined. This helps keep the batter light and airy, which gives the torte its signature rise and velvety texture.
Flourless Red Velvet Torte FAQ
An 8 or 9-inch pan works best for the amount of batter this recipe makes. If using a smaller 6-inch pan, I recommend halving the recipe. Be sure to use a pan that’s at least 3 inches tall, since the torte rises significantly in the oven.
Yes! Served warm, the torte will be extra gooey and rich. Let the torte cool completely first so it’s fully set—unmolding while it’s still warm can cause it to break. Once removed from the pan, individual slices can be gently warmed in a low oven or briefly in the microwave before serving.
Not necessarily—but I promise it won’t taste like vinegar! Just a teaspoon adds a subtle tang that’s classic to red velvet cake. Skipping it won’t affect the texture, but you’ll lose a bit of that signature red velvet flavor.
Don’t worry—you don’t have to start over. Just fold the egg whites into the chocolate mixture very gently and slowly. You can also expect the torte to rise and fall a bit more dramatically, with a slightly denser texture—it will still be delicious!
If Somehow You Have Leftovers…
Once completely cooled, store the torte (without the cream cheese whipped topping) covered at room temperature for up to 1 day, or wrap and refrigerate for up to 4 days. To freeze, wrap the torte tightly in plastic wrap and then foil; thaw overnight in the refrigerator or at room temperature before serving.
The cream cheese whipped topping can be made in advance and stored in the refrigerator for up to 2 days. For the best texture, add the topping just before serving.
This is one of those recipes that looks fancy but is so approachable, and I hope you give it a try for your next special occasion or date night. If you make it, don’t forget to come back and tell me how it turned out!
If you’re in the mood for more indulgent, chocolatey recipes, check out:
Double Dark Chocolate Cookies – chewy, chocolate-on-chocolate indulgence
Espresso Brownies – rich, fudgy, with a hint of coffee
Happy baking, and thanks so much for being here!
XO, Blue Mountain Baker 💙
Recipe Card

Flourless Red Velvet Torte
Equipment
- 8-inch round cake pan or springform pan
- parchment paper
- Mixing bowls
- Electric hand mixer or stand mixer
- Saucepan
- rubber spatula
- Whisk
- Measuring cups and spoons
- Kitchen scale (optional)
- Sieve
- Offset spatula or butter knife
- Cooling rack
- Serving platter or plate
Ingredients
Flourless Red Velvet Torte
- 4 large eggs separated
- ¾ cup granulated sugar, divided (½ cup/100g for whites, ¼ cup/50g for yolks)
- ½ cup unsalted butter 1 stick, 113g
- 4 ounces semisweet chocolate, finely chopped or chips 113g, good quality chocolate
- 2 tablespoons unsweetened cocoa powder
- 3 tablespoons canola oil
- 1 teaspoon white vinegar
- 1 teaspoon vanilla extract or paste
- ½ teaspoon salt
- 2 teaspoons red food coloring liquid or gel
Cream Cheese Whip Topping
- 4 ounces cream cheese, room temperature 113g
- 1 cup heavy cream, cold 240g
- ¾ cup powdered sugar 90 g
- ½ teaspoon vanilla extract or paste
- pinch of salt
Instructions
- Prep the pan & preheat the ovenPreheat the oven to 325°F. Grease an 8-inch round or springform pan with baking spray and line the bottom with parchment paper.
- Make the chocolate baseMelt the butter in a saucepan over medium heat. Remove from the heat and add the chocolate, stirring until smooth. Whisk in the cocoa powder until smooth. Add in the oil, vinegar, salt, vanilla, and red food coloring and mix until combined. Set aside to cool slightly.
- Whip egg whitesIn a clean bowl, using a stand mixer or hand mixer, whip the egg whites on medium speed until frothy. Gradually stream in the ½ cup sugar, then increase to high speed and whip until glossy medium peaks form.
- Combine the yolks & chocolateIn a separate bowl, whisk the egg yolks with the remaining ¼ cup sugar until slightly lighter in color and frothy. Slowly stream in the cooled chocolate mixture, mixing until smooth and evenly combined.
- Fold in the whitesGently fold the whipped egg whites into the chocolate mixture in three additions, folding each until just combined and airy.
- BakePour the batter into the prepared pan and smooth the top. Bake for 35–40 minutes, until the torte has risen significantly, is set at the edges, and slightly cracked on top. A toothpick inserted should come out slightly wet and fudgy—slightly underbaked is better than dry for this torte. Run a butter knife or spatula around the edge of the pan immediately after removing from the oven.
- CoolCool completely at room temperature. The torte will fall as it cools—this is normal and expected for a flourless cake! To remove, run a butter knife around the edges again if needed, then invert onto a plate and flip upright onto a serving platter.
- Make the cream cheese whipped toppingBeat the softened cream cheese, powdered sugar, vanilla, and salt with ¼ cup of the 1 cup heavy cream until smooth. Add the remaining cream and whip until light and fluffy.
- ServeServe the torte at room temperature, or chill for 30 minutes to 1 hour and serve chilled. Dollop the cream cheese whipped topping over the torte or serve alongside slices.